How to transform your garden decking with glass balustrade
With all the extra time we have spent at home over the last year during the Nationwide Lockdowns, thoughts have inevitably turned to DIY and how we can improve our homes. For many the garden has become a haven when a well needed break from "the same four walls" is required.
A great way to make the most of your garden is to make some improvements to the seating area; the place where you want to spend your time relaxing in the sun and a simple way to do this, is with a few toughened glass panels and some balustrade channel.
The beauty of DIY is that you are in full control of the project, meaning you can design your own system that works for both you and your garden, without the expensive labour costs. There is often a great sense of achievement through planning and building your own decking and balustrade system, followed by relaxing in your space once its all completed, with an even greater smile on your face knowing you saved plenty of cash in the process!
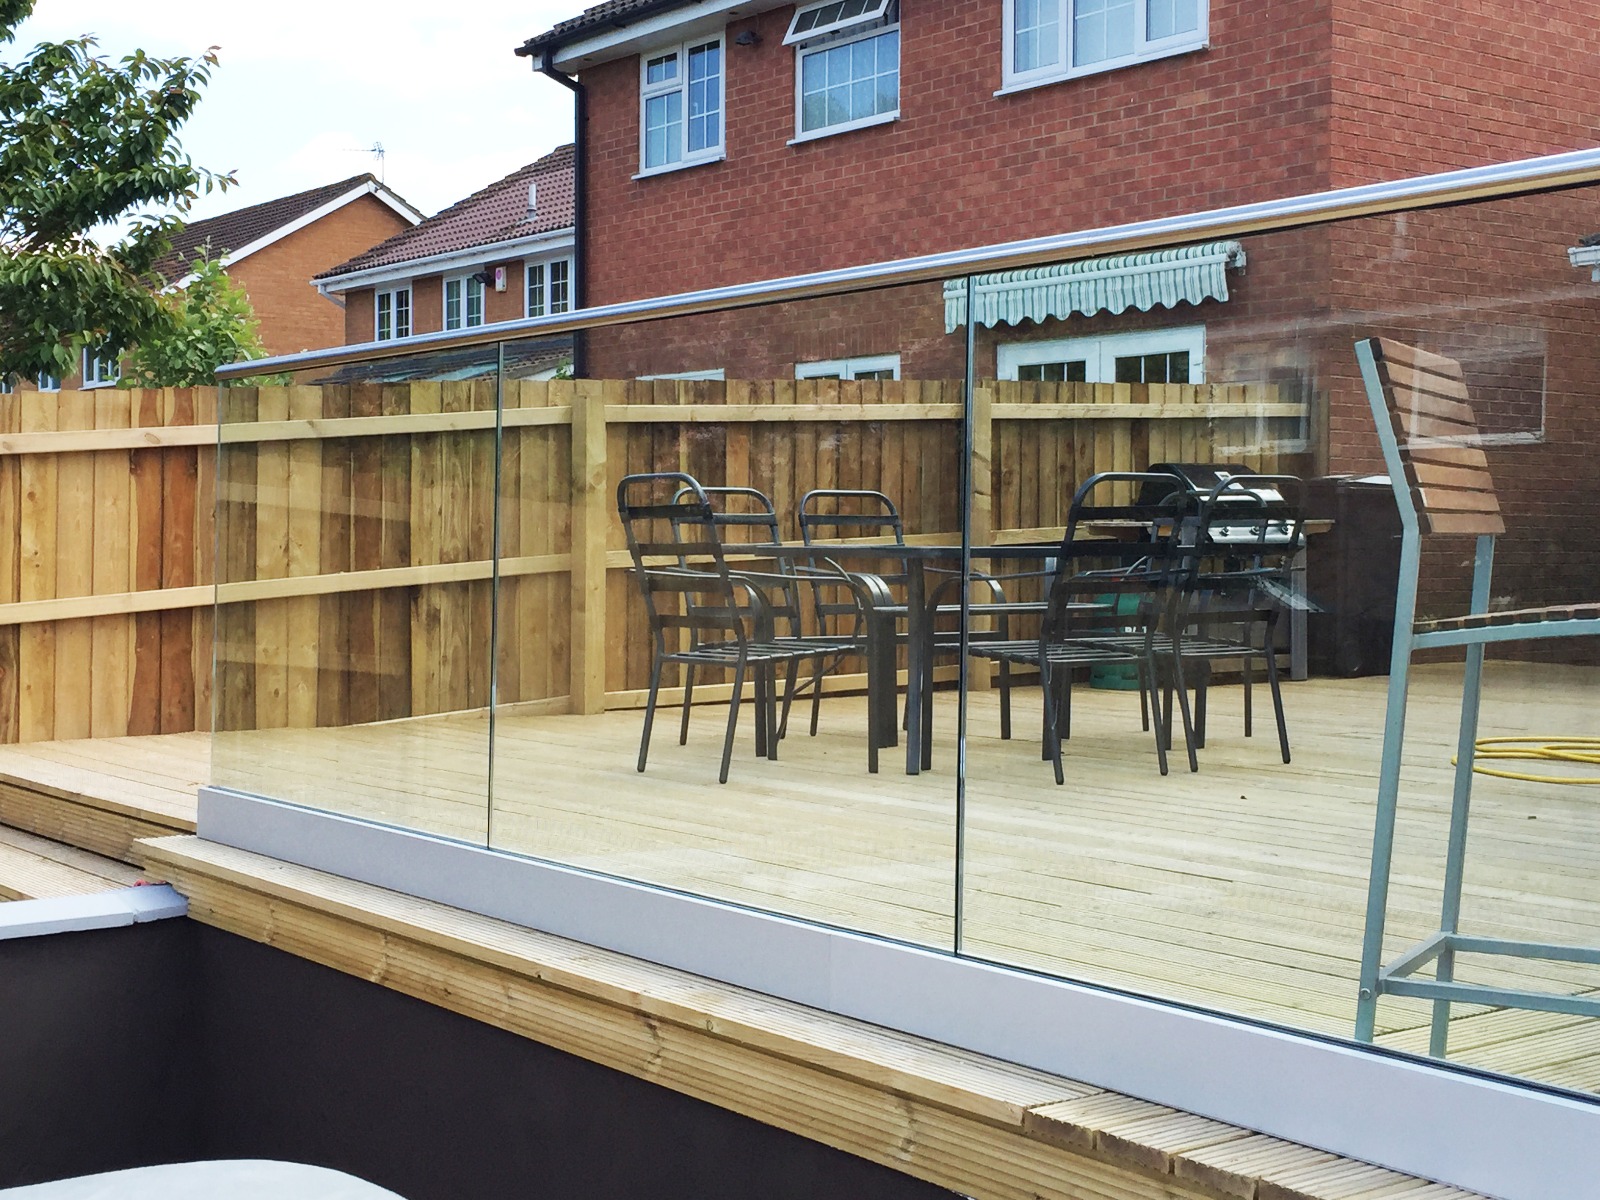
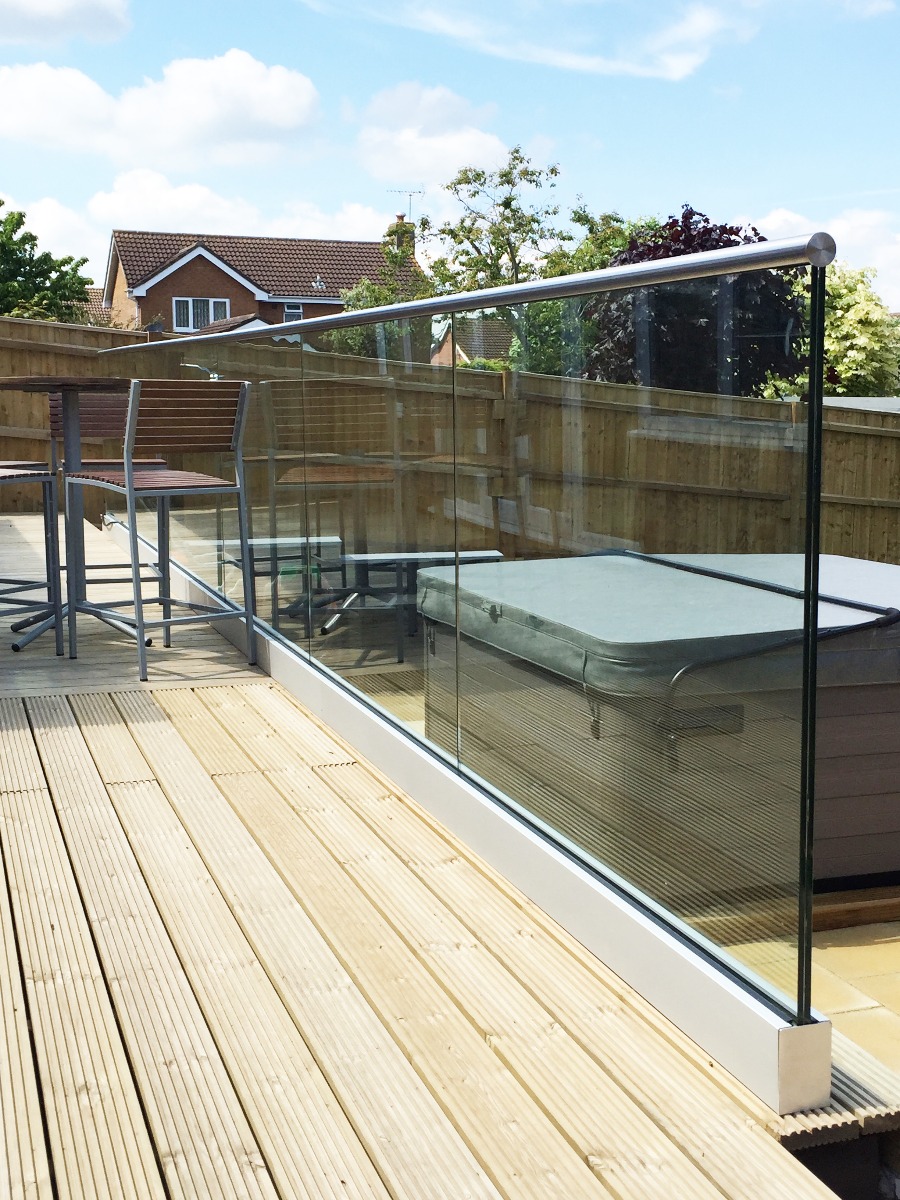
Our latest customer David was savvy enough to realise that adding frameless glass balustrading to his recently built decking area would further enhance the stunning seating area, as well as create a barrier from the wind, whilst still giving uninterupted views of his garden area.
David opted for the BarrierSabco system to complete his decking, due to it's simple installation and elegant, minimal aesthetic. He fitted the channel with 21.5mm clear toughened glass to give a clear view out into the garden and provide a wind barrier that is not gained in traditional timber spindles. Finally adding a split tube handrail on top of the glass panels for extra support. The finished result is stunning, creating a clear divide between his upper seating area and his lower hot tub and garden space.
Time for David to enjoy the rest of summer admiring his own work!
View frameless glass balustrade systems here.